Documentation
Start from a ready-made template
The fastest way to get online is to start from one of our ready-made templates. You pick a design you like, confirm, choose a plan, and we build your site for you — no design tools, no handoff bundle, nothing technical.
Where templates fit in onboarding
Creating a site has three short steps:
- Name your business. We suggest a web address (your slug) from the name —
for example Willow & Vine becomes
willow-and-vine.getbookable.online. You can edit the slug before continuing. - Design your site. This is where you choose a template (below), bring your own design, or ask for a Premium designer-built site.
- Choose a plan. Confirm your subscription and we finish setting the site up.
Choosing a template
On the Design your site step you'll see a carousel of pre-designed templates, each shown as a sample screenshot. Browse through them and pick the one that best fits your business.
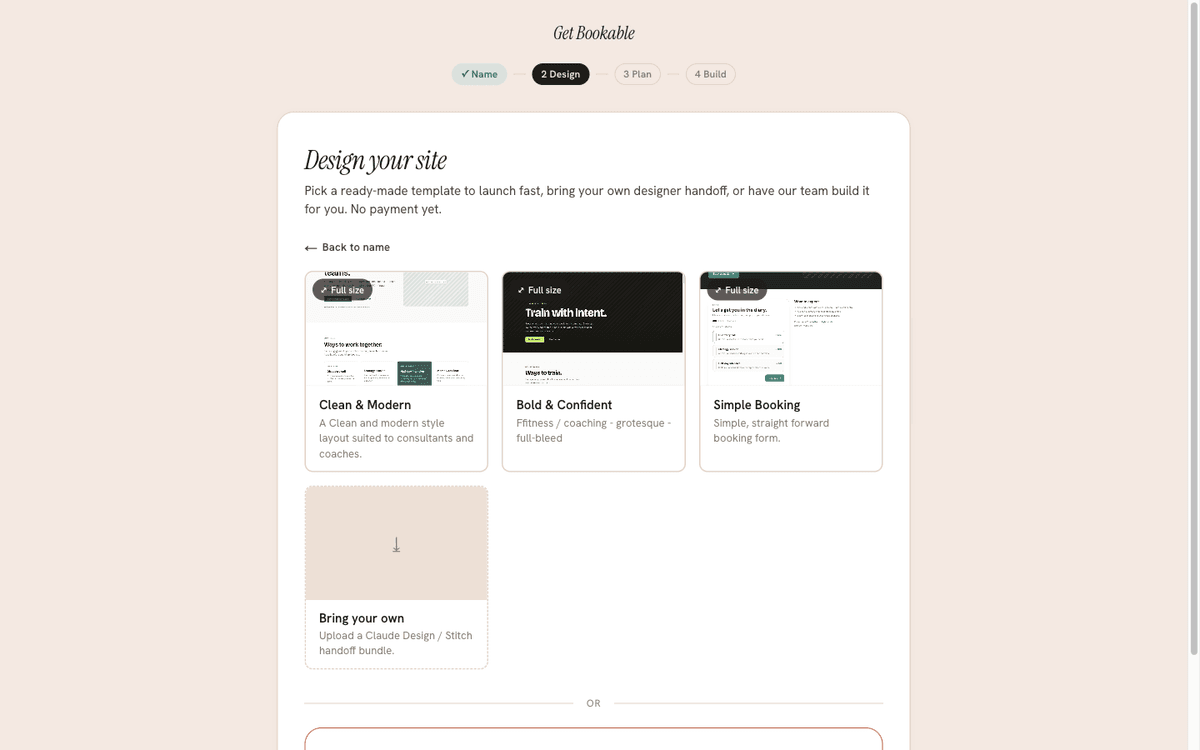
- Click a template to select it, then confirm your choice.
- Confirming carries that template through to the plan step — you don't upload or configure anything.
- Once your plan is active, we generate your site from the template and drop in your business name and details.
Templates are a starting point, not a cage. After your site is live you can edit the wording, swap images, set your services, and adjust branding from your admin — see Editing pages & content and Profile & branding.
Want something more custom?
The Design step also offers two alternatives to a template:
- Bring your own design — if you (or a designer) have produced a custom design, upload it as a handoff bundle. See Bring your own design.
- Premium — ask us to arrange a call with a designer who builds the site for you. Select the Premium card to request a call (availability varies).
After your site is live
When setup finishes you land in your admin shell. The natural next steps are:
- Add your services and prices.
- Set your opening hours and availability.
- Optionally connect Stripe, Zoom, and your calendars.